
If you are a mac lover and want to experience all new features of hackintosh sierra a but you do not want to purchase a New Macbook Or Imac as they are very expensive. so today i am here with the guide on “How How to Install macOS Sierra Final on VirtualBox on Windows PC” hackintosh sierra This is step by step guide and we have used very simple english language to make you understand each and every word without any difficulty. pple has recently announced MacOS Sierra the latest version of Mac System.
We are using virtual box to install this MacOS Sierra on Our windows pc. this method is known as hackintosh. Please follow each and every step of this installation guide and please read this Requirements which are needed to install Hackintosh macOs Sierra.
Requirements
- Your Computer or Laptop must have 64 bit windows.
- Atleast 4gb Ram or higher than 4GB to run this MacOs Sierra without lag.
- Dual Core processor intel’s processor will work fine with this.
- A Decent Graphics Card. Nvidia would work fine.
Downloads
Download Macos Sierra image Full
Download Mac Os Sierra Image ( 5 Parts )
Download Virtual Box
How to Install macOS Sierra Final on VirtualBox
Steps 1) First of all download the full image of MacOs Sierra and extract the Zip File.
Step 2) Now Download the Virtual Box from the above link and install it as well.
Step 3) Now after installation open the Virtual Box and create a New Machine.
Name it anything you want
Type : Mac OS X
In Version Select MAC OS X 10.11 EL Capitan 64 Bit
Select the Ram You want to give to your Virtual Machine ( 70 % Of your RAM)
Add a virtual Disk macOS 10.12 Sierra.vmdk.
Step 4) Once you created your virutla machine click on Edit And edit your Virtual machine like this :-
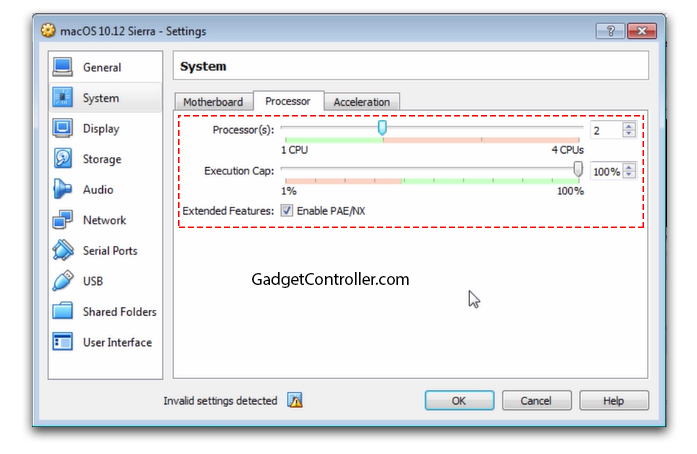
Go to System then select processor enable PAE/NX
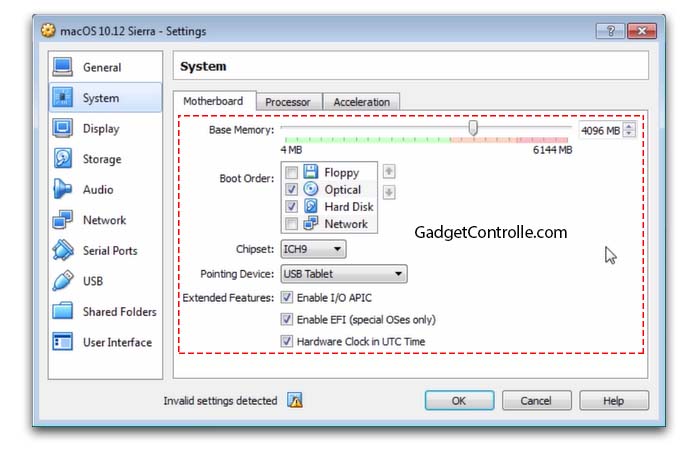
Then Go To System then Motherboard Enable : EFI, Disable Floppy, Chipset is PIIX3 or IHC9
Now go to display select screen Set Graphics to 128 MB vRam.
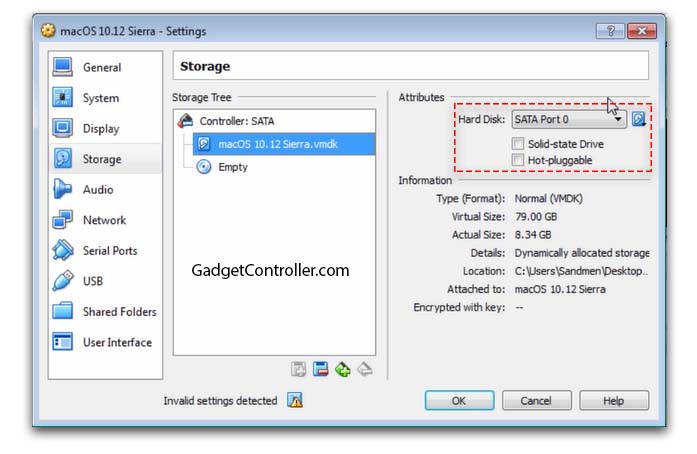
Now go to storage macOS 10.12 Sierra.vmdk
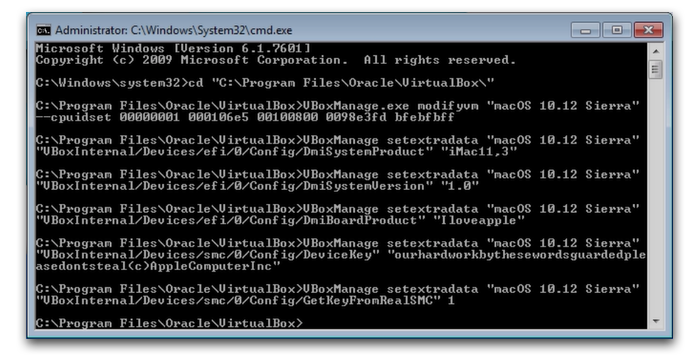
Step 5) Now Run the CMD as a admin and add these code.
Replace “Your VM Name” with the name of your Machine add these code.
For Virtual Box Version 5.x.x
cd “C:\Program Files\Oracle\VirtualBox\”
VBoxManage.exe modifyvm “Your VM Name” –cpuidset 00000001 000106e5 00100800 0098e3fd bfebfbff
VBoxManage setextradata “Your VM Name” “VBoxInternal/Devices/efi/0/Config/DmiSystemProduct” “iMac11,3”
VBoxManage setextradata “Your VM Name” “VBoxInternal/Devices/efi/0/Config/DmiSystemVersion” “1.0”
VBoxManage setextradata “Your VM Name” “VBoxInternal/Devices/efi/0/Config/DmiBoardProduct” “Iloveapple”
VBoxManage setextradata “Your VM Name” “VBoxInternal/Devices/smc/0/Config/DeviceKey” “ourhardworkbythesewordsguardedpleasedontsteal(c)AppleComputerInc”
VBoxManage setextradata “Your VM Name” “VBoxInternal/Devices/smc/0/Config/GetKeyFromRealSMC” 1
For Virtual Box Version 4.x.x
cd “C:\Program Files\Oracle\VirtualBox\”
VBoxManage.exe modifyvm “Your VM Name” –cpuidset 00000001 000306a9 04100800 7fbae3ff bfebfbff
VBoxManage setextradata “Your VM Name” “VBoxInternal/Devices/efi/0/Config/DmiSystemProduct” “MacBookPro11,3”
VBoxManage setextradata “Your VM Name” “VBoxInternal/Devices/efi/0/Config/DmiSystemVersion” “1.0”
VBoxManage setextradata “Your VM Name” “VBoxInternal/Devices/efi/0/Config/DmiBoardProduct” “Iloveapple”
VBoxManage setextradata “Your VM Name” “VBoxInternal/Devices/smc/0/Config/DeviceKey” “ourhardworkbythesewordsguardedpleasedontsteal(c)AppleComputerInc”
VBoxManage setextradata “Your VM Name” “VBoxInternal/Devices/smc/0/Config/GetKeyFromRealSMC” 1
Done Congratulations !
Now run your virtual machine.
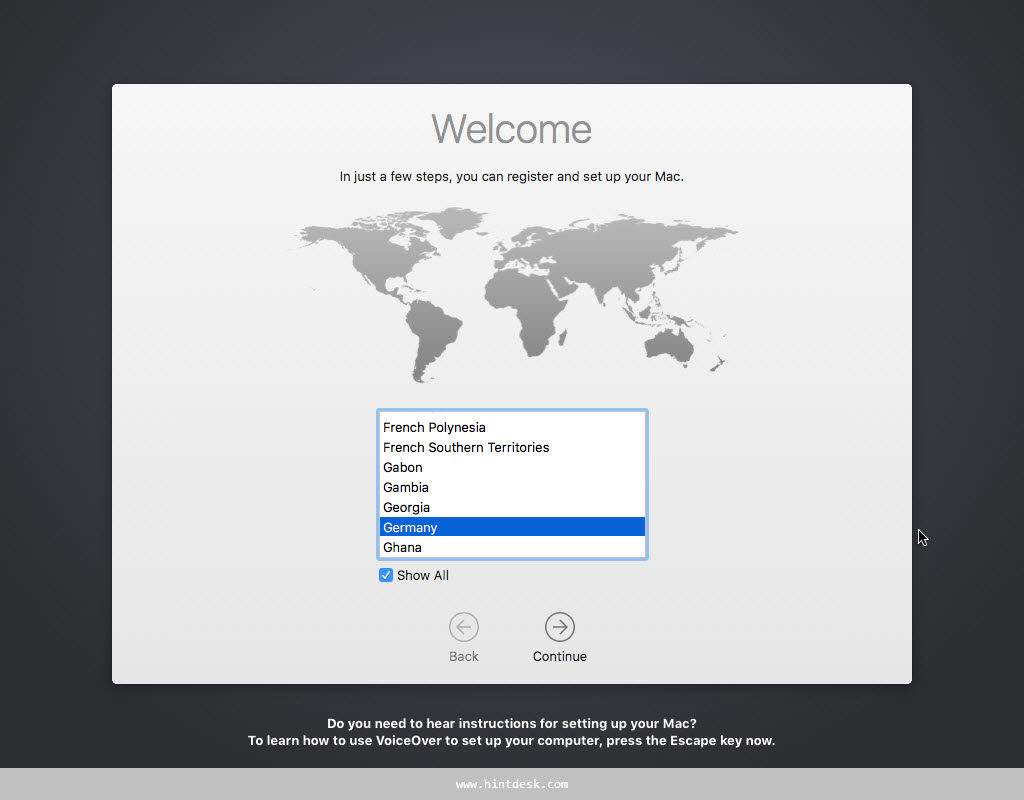
Welcome Screen
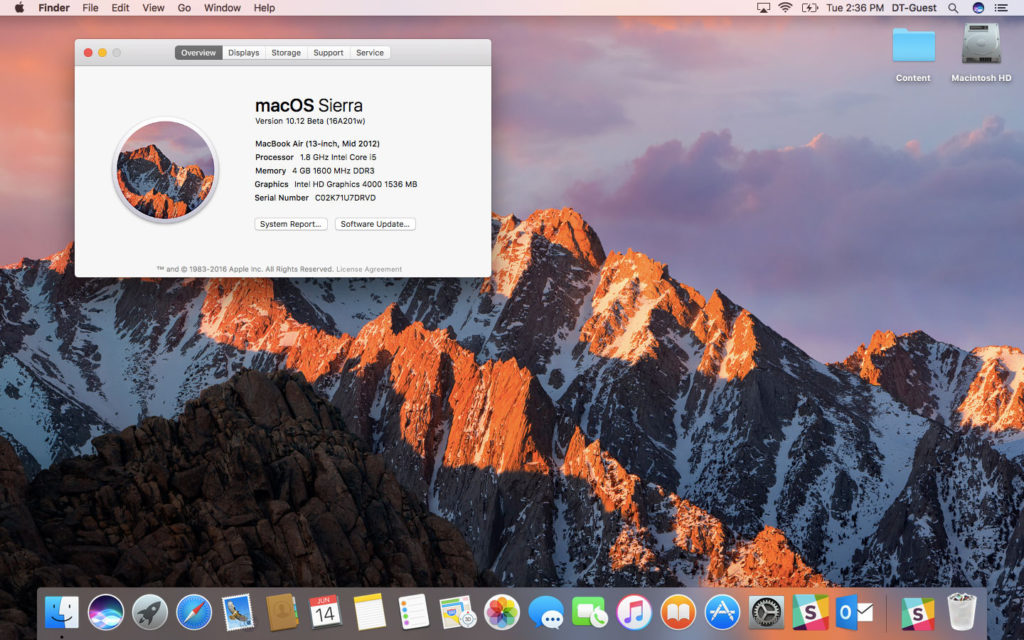
Sierra Desktop Screen
")

